
This post and several posts to follow will detail how to design, host, and implement an effective asset inventory using the ArcGIS for Desktop Suite and ArcGIS Online, in conjunction with the Collector for ArcGIS app (Android, iOS, Windows 10).
Note: In order to utilize the Collector for ArcGIS and publishing ArcGIS Online services from ArcMap, an ArcGIS Online subscription is required.
Step 1: Creating a Dataset
If you are both designing and utilizing the dataset that will be created through the data collection effort, congratulations, you might already know exactly what you want to collect and how to design your feature classes and attributes. However, if you are developing a GIS solution for someone else, it is important to work closely with that person to identify exactly what information is going to be collected before there are people in the field collecting. It is much easier to make a change to a domain value / max field length before an ArcGIS feature layer is deployed to the cloud.
Fortunately, feature classes have built in quality assurance capabilities and they translate well into ArcGIS Online. These QA measures come in the form of domains. Domains in the ArcGIS for Desktop environment turn standard text attributes into dropdown lists. This is great for preventing varied user data entries (think Yield vs Yield Sign vs Yld).
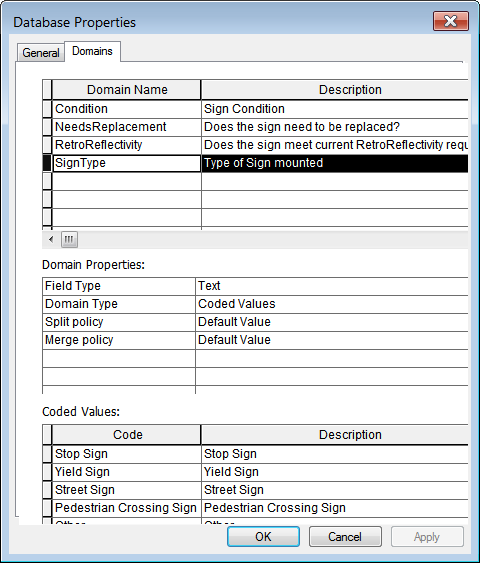
Domain Definitions in an ArcGIS File Geodatabase
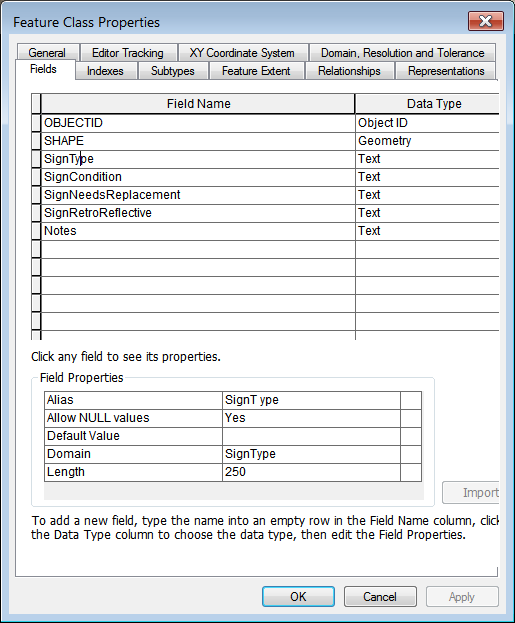
Feature Class Attribute Creation, with Domains Assigned
After that, create the feature class that will act as a template for the ArcGIS Online feature layer. Be sure to assign the domains to the appropriate attribute as you are creating attribution for the feature class. You can also define feature templates and symbology now, or after the feature layer is published to ArcGIS Online.
Step 2: Publishing Feature Classes to the Cloud
Add that newly created feature layer into an ArcMap session. As stated above, you can define templates and symbology now or later in the cloud. I opted for the former, because I liked the symbology options that were available in ArcMap.
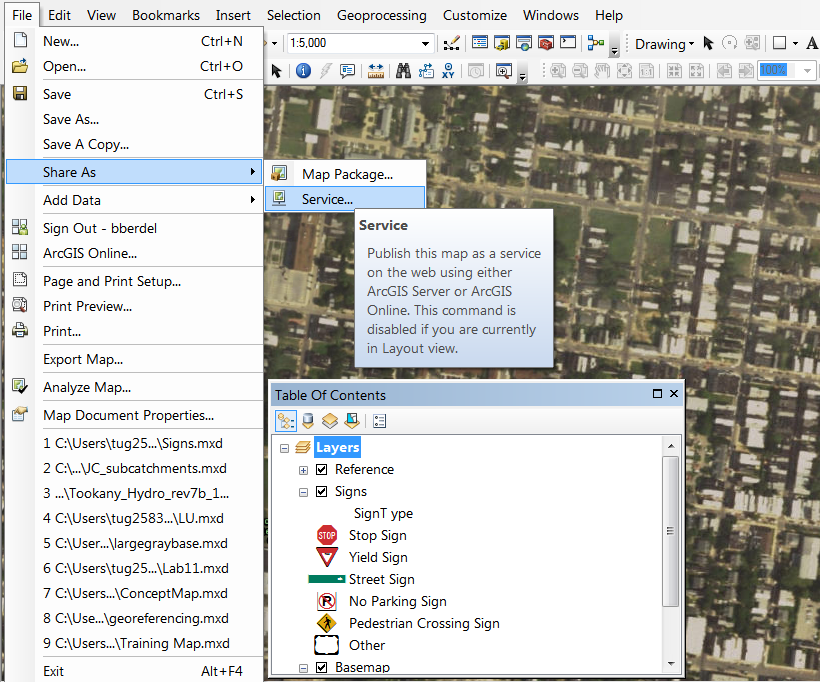
Publishing a Feature Class with Symbology Loaded into ArcMap
Sign in to your ArcGIS Online account via the File menu, and publish the service using File:Share As:Service (seen above). In the dialog window that appears, select Publish a Service and click next. Name the service, and click continue.
In the service editor that appears next, be sure that the service being published has the Feature Access option checked under Capabilities, as well as at least the Create and Update Operations allowed (seen below). Enter a summary and tags as required, and click the publish button to begin creating an ArcGIS Online Feature Layer.
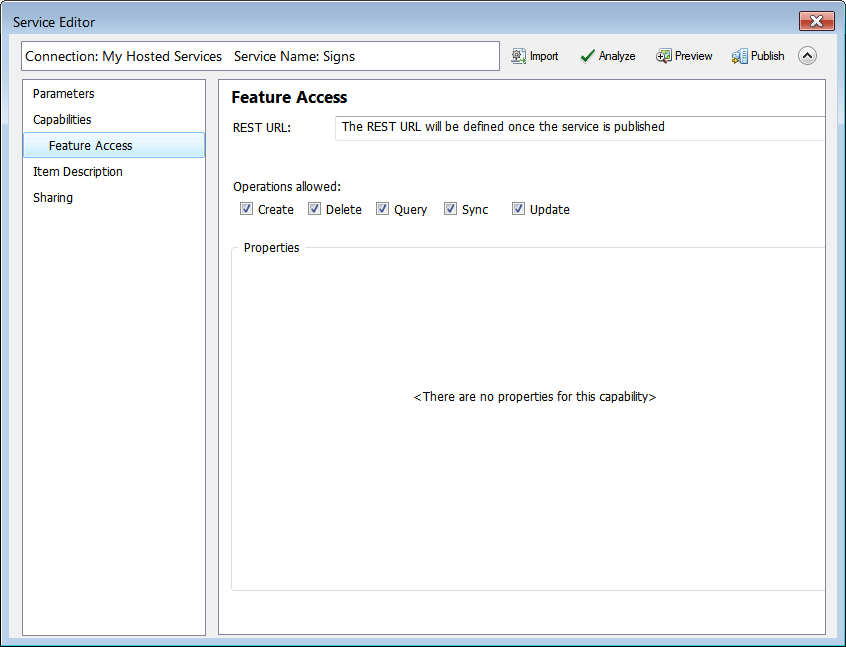
Configuring a Feature Service to have Add and Edit Capabilities.
Step 3: ArcGIS Online & Beyond
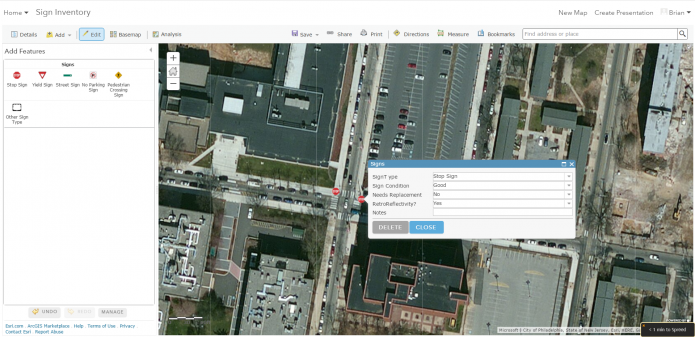
Log in to your ArcGIS Online account from your web browser. From your organization’s home page, click on My Content, this is where your newly published feature layer is being stored. Use the Create: Map menu item to create a new web map to utilize and share the feature layer. The new map will automatically open. Using the Add menu item, search for your newly created feature layer and add it to the map. Be sure to save the map after adding the feature layer.
From here, you can add data and alter symbology and the basemap. The webmap can be public facing or private, and shared via link or embedded into another website via HTML.
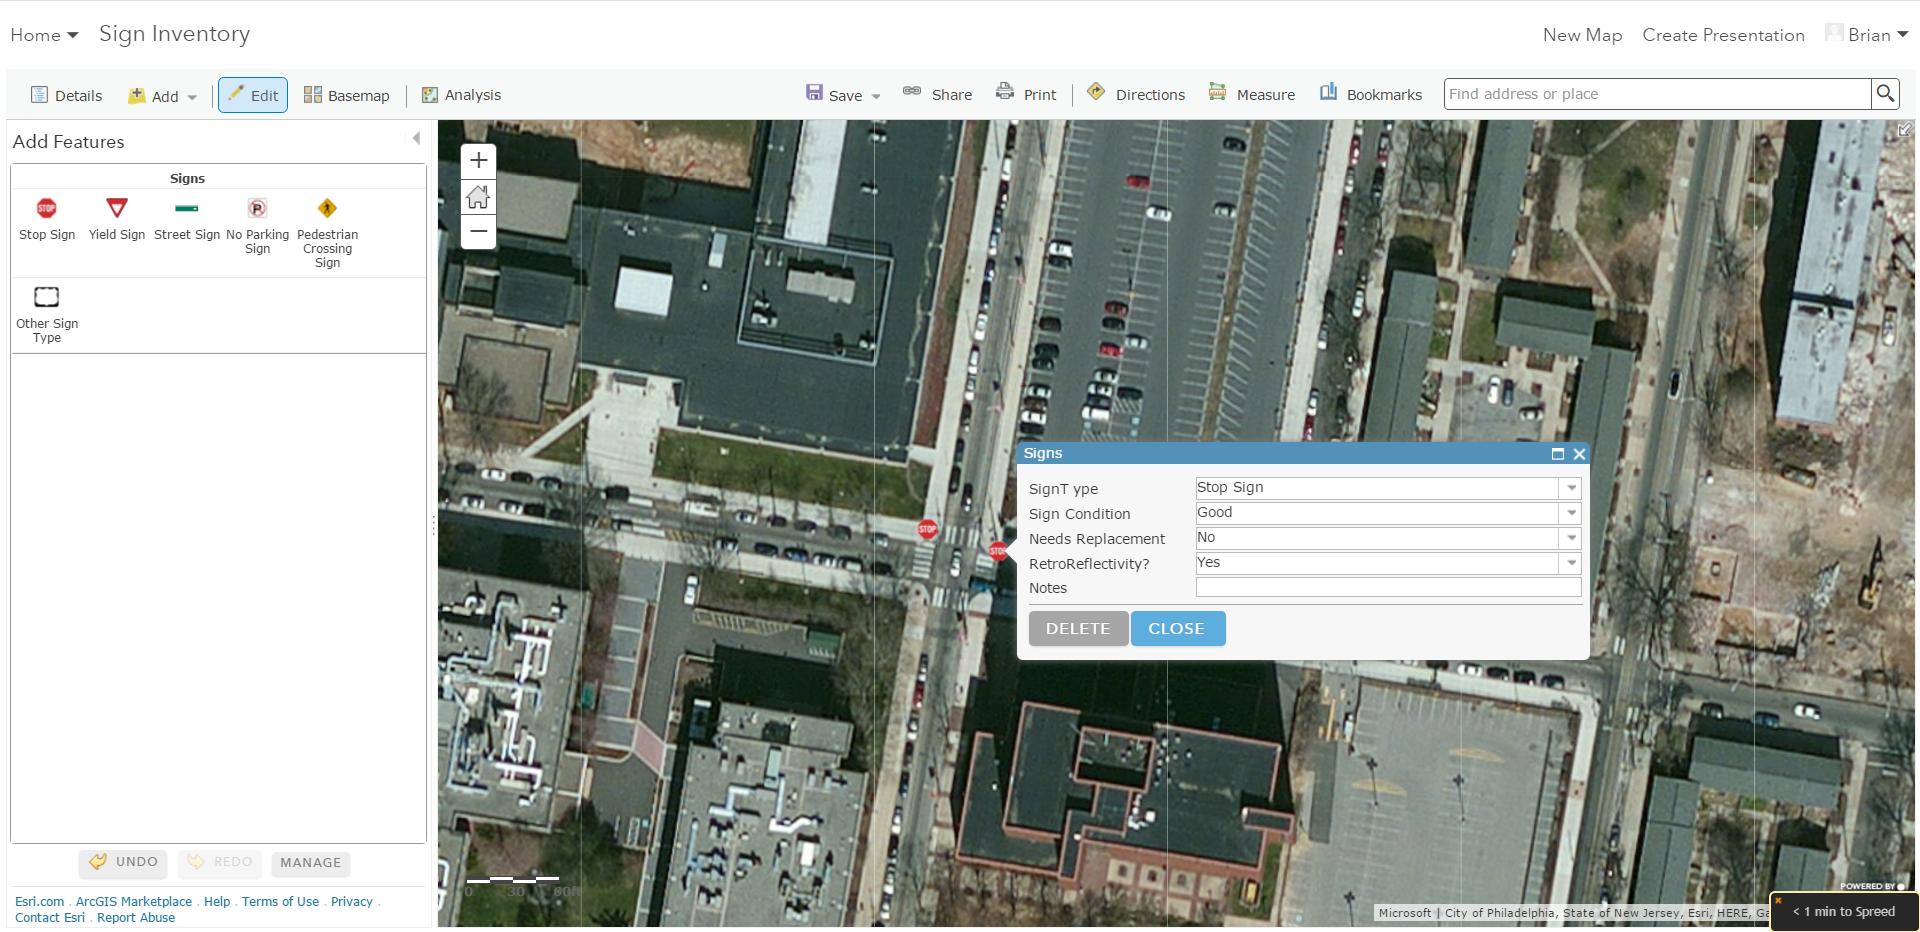
An ArcGIS Online Webmap with Fields and Domains Created in ArcGIS Desktop
In the next blog post, I will go into detail about collecting data with the Collector for ArcGIS app for mobile devices.