Ariel Siegelman

As we get closer to the beginning of the semester, you may be wondering if there are any new Zoom features that you can use in order to provide a smoother and more engaging online learning experience for your students. Over the past several months, Zoom released some great new features that you can use right away as you dive into teaching your fall courses!
Before you go into Zoom and test out these new features, make sure that you have the most up-to-date version of Zoom, otherwise these features may be unavailable. To do so, you can go to the Zoom program on your computer, click your profile picture in the upper right corner of the window that appears, and select “Check for Updates” from the drop-down menu.
Here are nine of our favorite new Zoom features:
1. Share screen to all Breakout Rooms
If you’ve ever facilitated a breakout room activity where you’ve all had students evaluating the same questions or content, you may have wished that you could share your screen to the breakout rooms while they are in session. Now you can! While the breakout rooms are open, clicking the Share Screen button in Zoom will give you a “Share to breakout rooms” option. You can use this feature to share multimedia or a common list of questions for students to discuss. Note that sharing your screen will interrupt any student screenshares in the breakout rooms.
2. Focus Mode
For instructors who facilitate and proctor quizzes and exams on Zoom, this new feature is an absolute godsend! Enabling Focus Mode will allow only hosts to see participants’ videos and screenshares, and the host can easily switch between different participants. Additionally, they can choose specific co-hosts and participants to also see these screenshares if they wish. This means that instructors can require students to be sharing their screens simultaneously while taking an exam, and then the host can review each student’s screen, without the students seeing each other’s screens. This is also useful if a student wants to share or troubleshoot something on their computer privately with the instructor, without sharing their screen with the entire class. In order to use Focus Mode in a Zoom meeting, you first must go to https://temple.zoom.us/profile/setting and turn on Focus Mode.
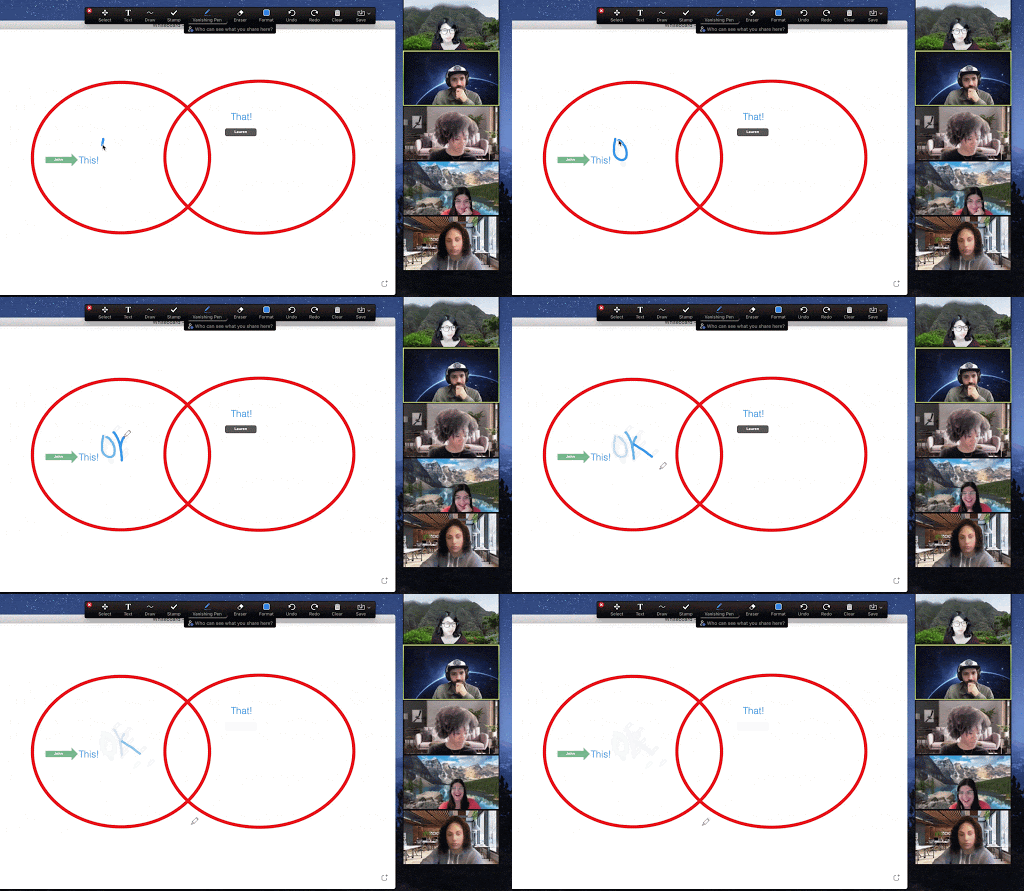
3. New annotation tool: Vanishing Pen
This new feature in the Annotation toolbar, which appears when screensharing or using the Whiteboard, allows hosts and participants to use a pen tool whose drawings slowly vanish. This is helpful if you only want to circle or underline something temporarily–instead of having to erase the marking, it will slowly disappear after a few seconds. You can activate the Vanishing Pen by clicking on the Spotlight button in the Annotation toolbar, and then selecting Vanishing Pen.

4. Share and play video files directly into meeting
This feature, located in the Advanced tab of the Share Screen window, allows you to directly choose a video file from your computer to play through screensharing. Instead of having to share your desktop and bring up the file, or share a specific video playback program, the video file will play directly in Zoom for all meeting participants to watch.
5. Full emoji suite & “away” coffee cup for Reactions
If you click on the Reactions button in Zoom, you’ll notice that you have a full array of emojis to choose from in order to express your emotions! When an emoji or icon is selected, it will appear in the corner of your video, as well as next to your name in the Participants window. These Reactions will remain active until you decide to turn them off. Additionally, you will also find the coffee cup icon, which will display an “away” status for you. You and your students can use this coffee cup to include when you’ve stepped away from the computer for a moment.

6. Request Live Transcription enablement as participant
A new feature that Zoom added last year was live speech-to-text transcription, which when enabled by the host, participants can turn on in order to view live generated subtitles of the meeting’s audio. Participants can now click a button to request for the live transcription to be turned on. The host will be notified of this request and then be presented with a button that allows them to enable the transcription immediately. These features are all located in the Live Transcript button in a Zoom meeting. Consider enabling the Live Transcript in order to make your Zoom classes more accessible!
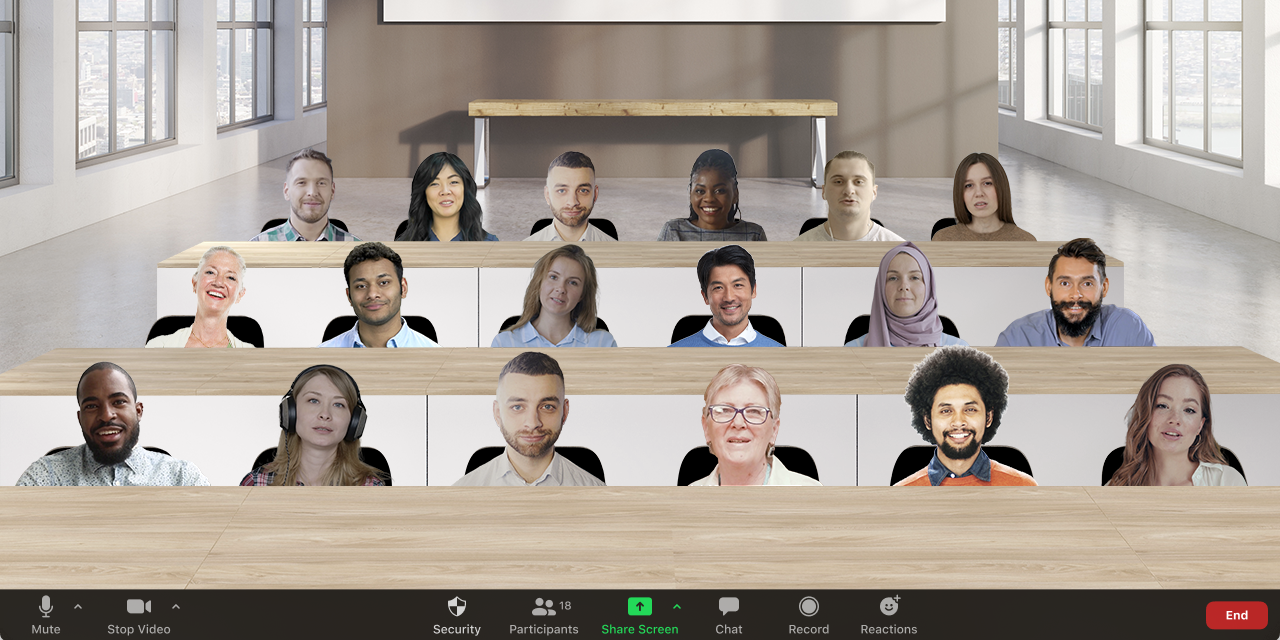
7. Immersive View
Wish a Zoom meeting felt more like a classroom? Immersive View was designed to do just that: Present a virtual space that feels more like everyone is sitting together in-person. To enable Immersive View as the host, click the View icon in the upper right corner of a Zoom meeting, and then click “Immersive View.” You’ll be presented with several options for virtual immersive “rooms” for up to 25 participants.

8. Mute and Video Off when joining a recorded/live streamed Meeting
When participants join a meeting that is currently being recorded or livestreamed, they will be notified, and their audio and video will automatically be turned off. This will allow them to fully opt into being recorded or not, without their face or voice accidentally being recorded if they do not consent to it.
9. Post-meeting survey
Finally, hosts now have the ability to have Zoom prompt participants to take a survey after they leave a Zoom meeting, including through third-party survey tools such as Canvas surveys or SurveyMonkey. After students leave a Zoom meeting, the survey will automatically load in their browser. Hosts can then review the survey results via the Reports feature at https://temple.zoom.us/account/report or through the third-party website. This is a great opportunity to ask students about their experience in your Zoom class and use their feedback to continuously improve as an online instructor. It’s also a great way to facilitate end-of-class active learning activities, such as the Exit Ticket, where students are prompted to provide any questions they currently have about the course, or to answer a series of short questions checking their understanding of the day’s content. To apply a post-meeting survey for a Zoom meeting, you first must go to https://temple.zoom.us/profile/setting and turn on Meeting Survey. Then, after scheduling a Zoom meeting, the Survey feature will be available at the bottom of the meeting confirmation page.
To learn more about how to use these features, you can visit our in-person Educational Technology Labs, our Virtual EdTech Drop-in Lab, or book a consultation with an Educational Technology Specialist. Information and links to these services are available at catbooking.temple.edu.
Happy Zooming!
Ariel Siegelman is Senior Educational Technology Specialist at Temple University’s Center for the Advancement of Teaching.