By Emily Logan
Maker Faire NY 2016
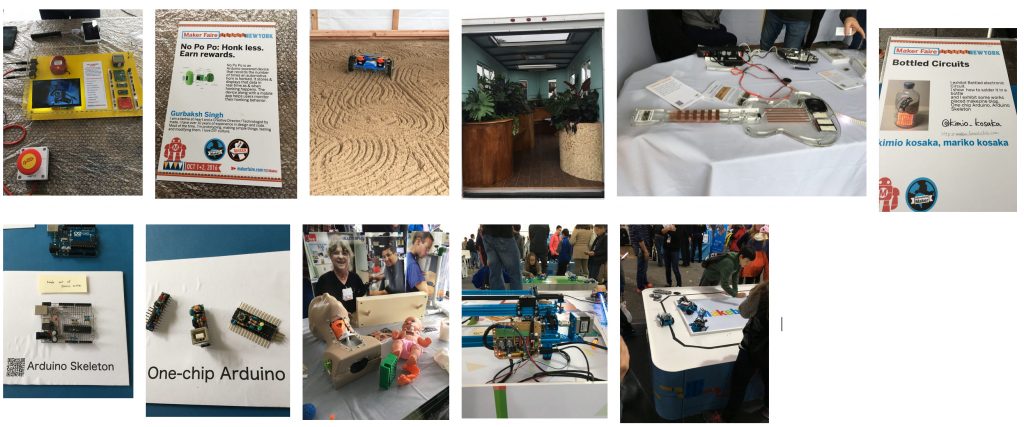
Below are some photos I took from the Maker Faire in NYC that took place this Oct. 1st. It was a rainy day, but a huge turnout. Thousands of people from all ages and backgrounds gathered in New York to share the latest in technology and experimentation. The “No Po Po: Honk less” project by Gurbaksh Signh was a project created in India, the honking capital of the world. The purpose of the device is to count and record how many times you honk your horn, and the less you honk the more rewards you earn. This project touches on sound pollution and the effects that it has on quality of life and happiness of drivers. “Bottled Circuits” and “Arduino Skeleton” were projects created by Kimio Kosaka, a Japanese maker who teaches electronics and runs a a tech shop. The Arduino skeleton is particularly interesting because it was not built on a breadboard, but rather it was built using piano wire as the soldered connections.
Granular Synthesizer: Creating a Sound Bite Garden
My main project at the DSC for the semester is building 5 granular synthesizers (with MIDI connections) using the instructions from the Notes and Volts page. Once constructed, these synthesizers will be given to 5 different musicians of various genres to use for experimentation. “Soundbite” WAV files will be given back to me in exchange for the instrument I built for them. In this exchange, I will create a sound bite garden from the work produced. To complement my experimentation with electronic synthesizers, I am being trained by a local church in sound mixing and sound engineering.
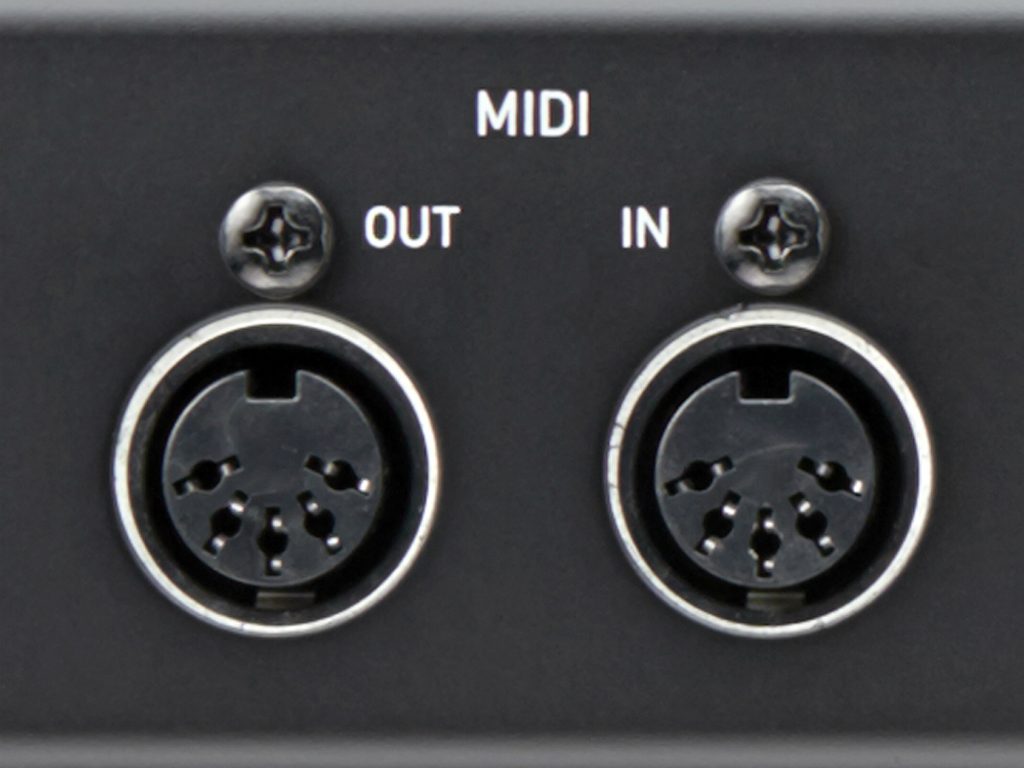
So, what exactly is a granular synthesizer and what is a MIDI?
Granular synthesis is a process that takes sounds that are broken into tiny grains and then redistributed and reorganized to form new sounds. A grain is a small piece of sonic data. On the synthesizer I am building, there are 5 knobs that can be manually turned to change the frequency and pitch of sounds created with electronic instruments.
MIDI stands for Musical Instrument Digital Interface which is a protocol that allows electronic instruments and other digital musical tools to communicate with each other. MIDI is not an instrument, but merely sends messages like “note on,” “note off,” “pitchbend” and many other commands. For my purposes with building the synth, I will be installing a MIDI port into the hardware of the machine that can then be plugged into a keyboard, guitar or even a computer.
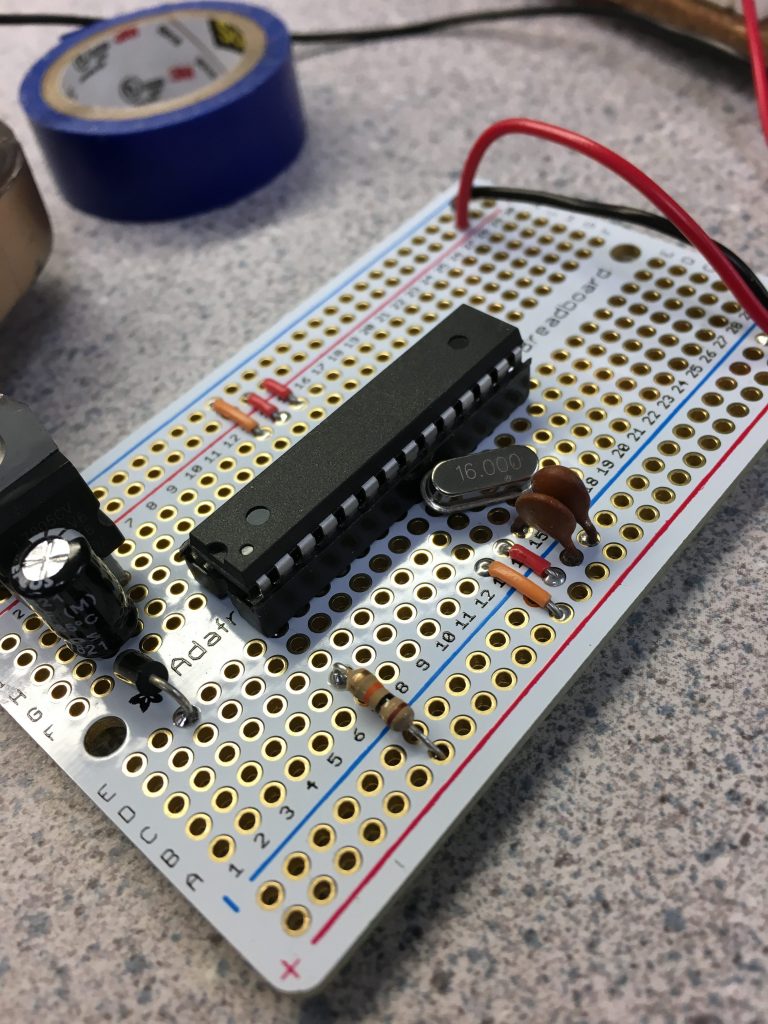
Every synthesizer needs a circuit board in order to function. The basic board I am working with looks something like the one seen above. Note that once the board for my project is finished, they will look a lot more complicated than this. The circuit above merely shows what an Arduino looks like transferred onto a protoboard.
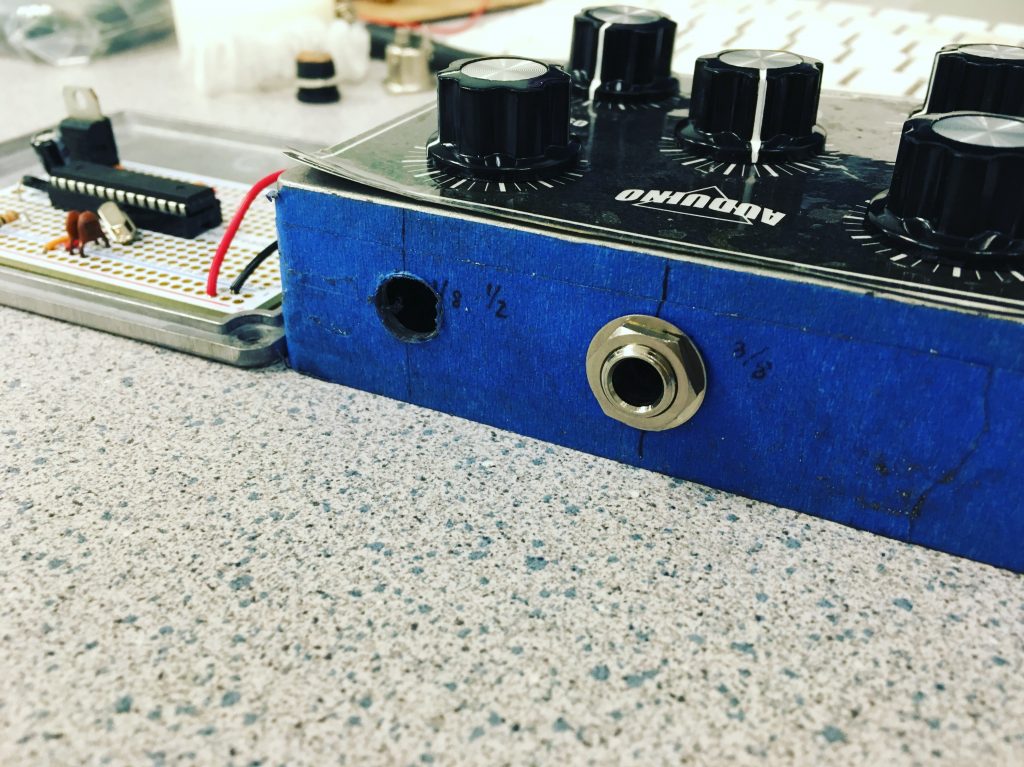
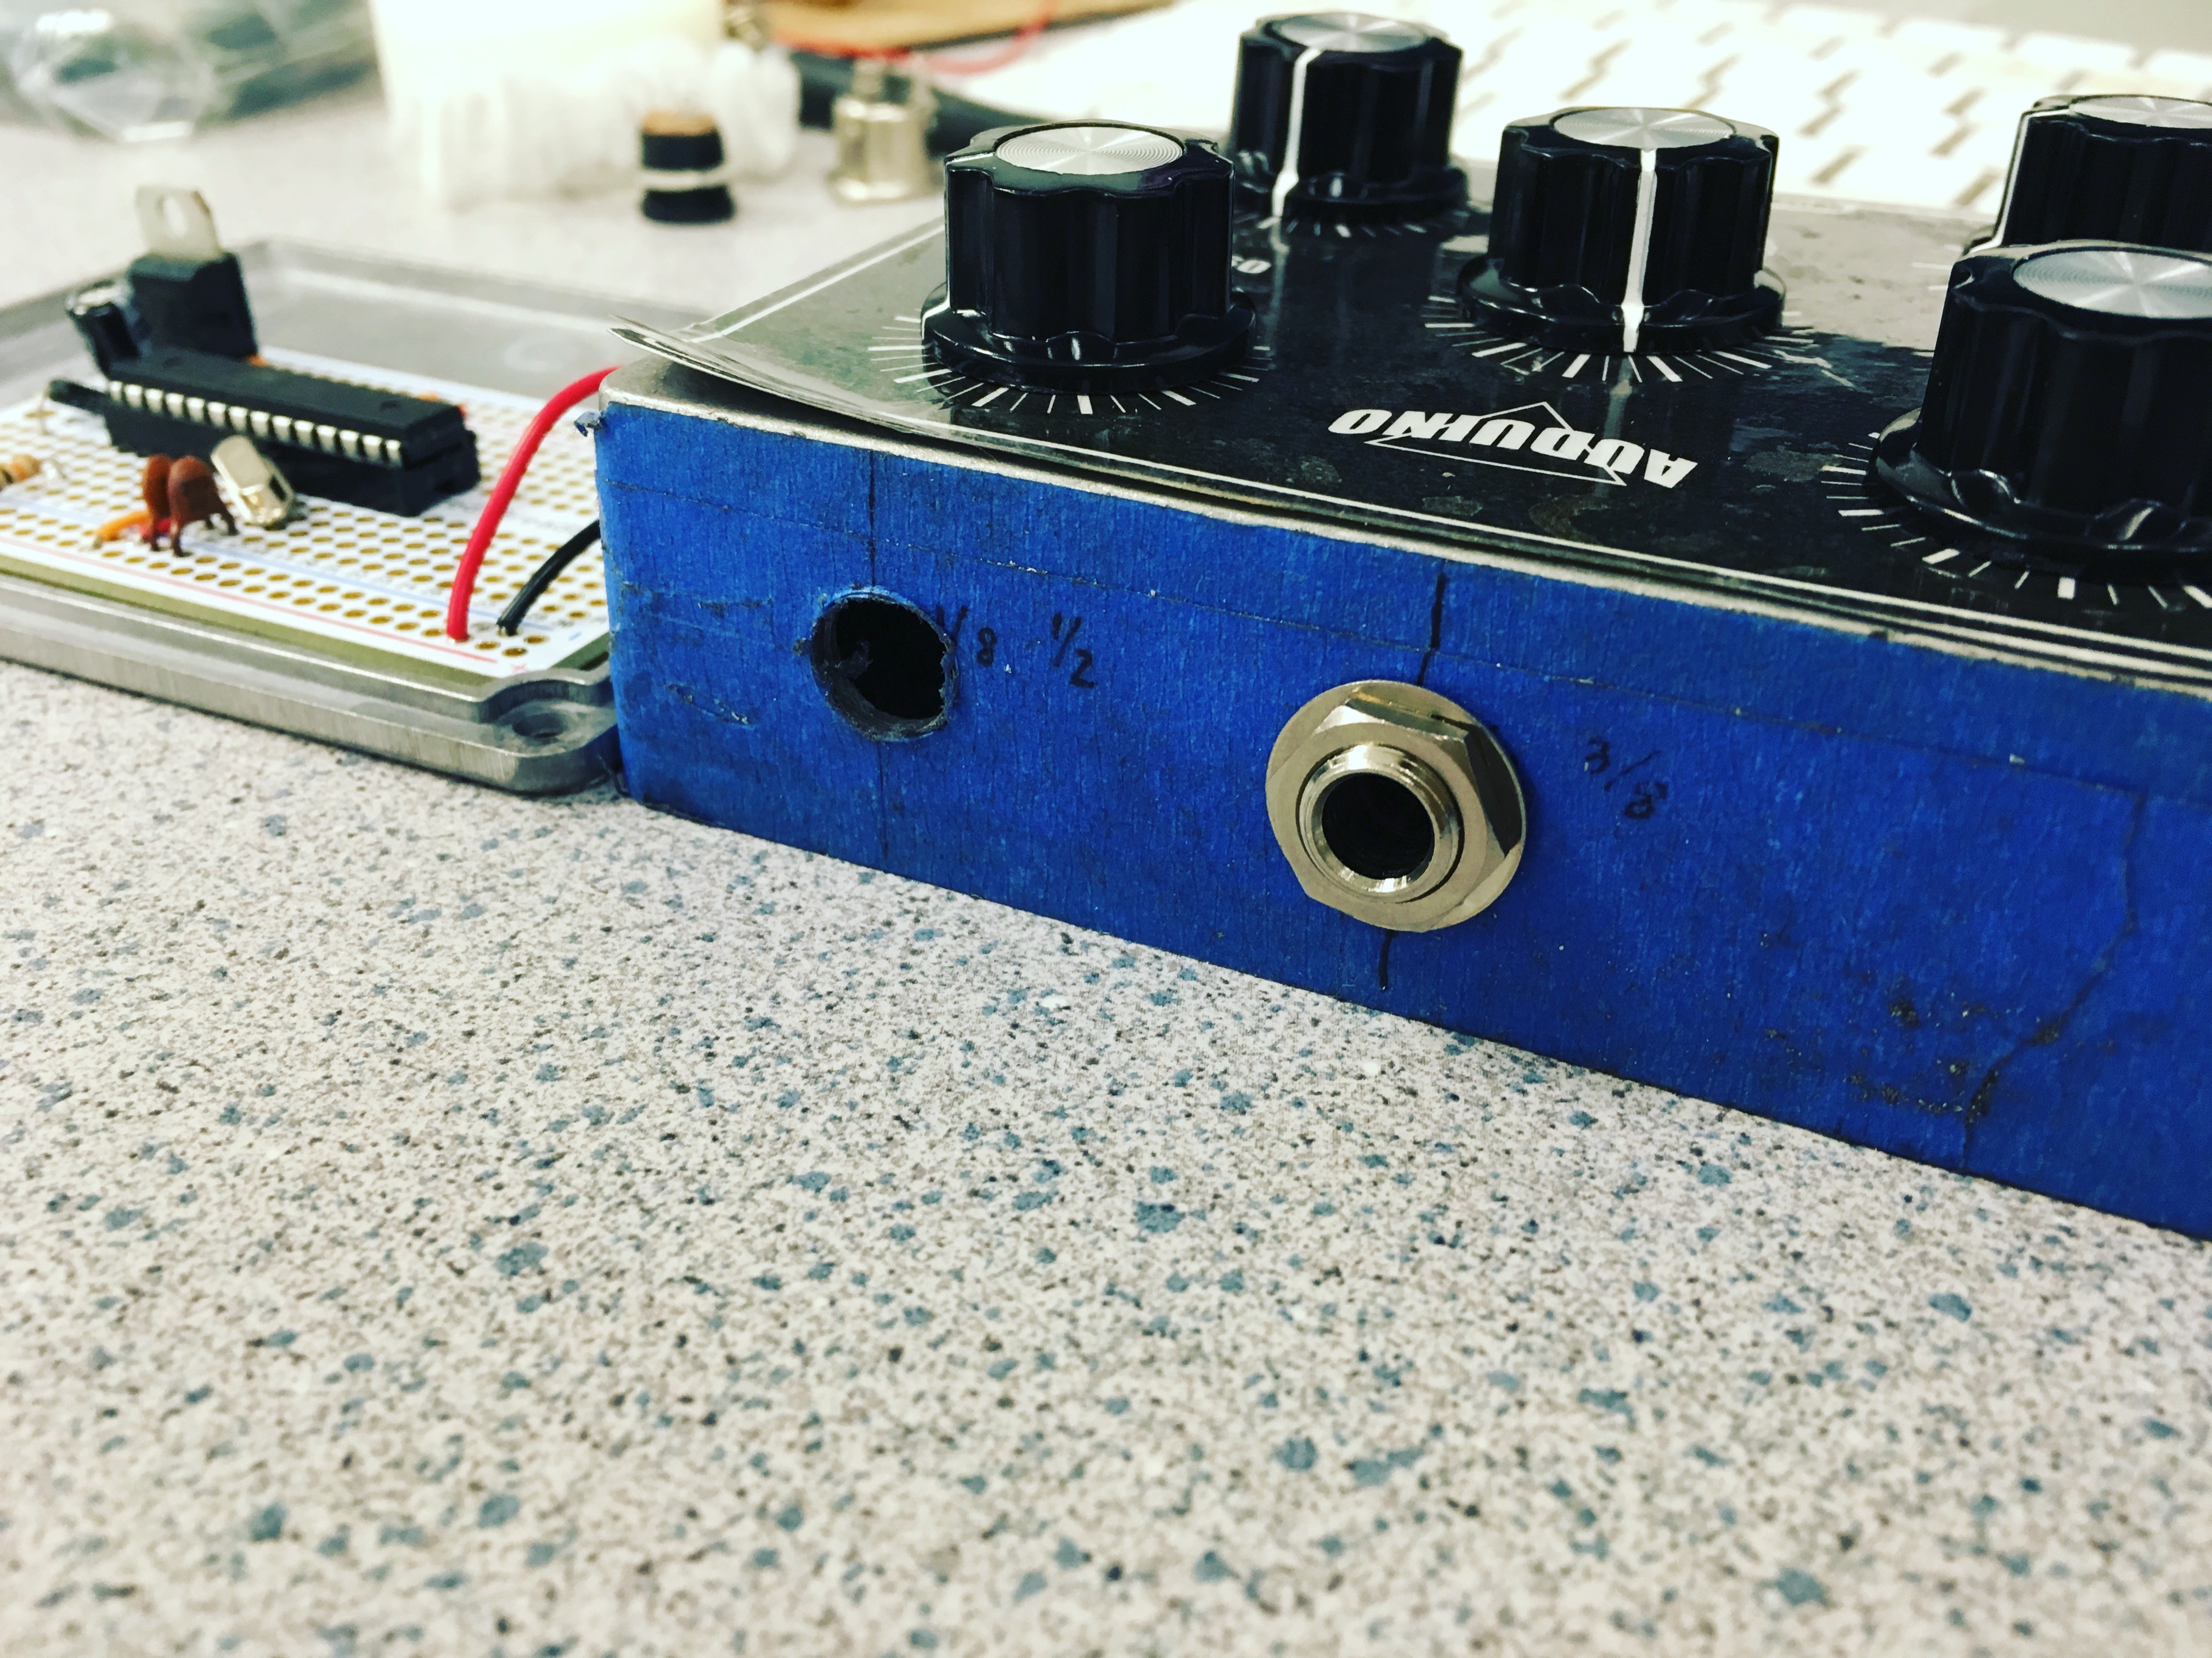
For these synthesizers, I soldered all the components of an Arduino on a protoboard to free up the Arduino. Protoboards are nice because they allow your project to operate outside of connecting to a computer. Before I could solder the micro-controller to the board, I had to first program the chip to run as an ISP. ISP stands for In System Programer, this allows you to use the board to burn the bootloader onto an AVR (a type of micro-controller that has flash memory for program storage). A bootloader is a program used to load an operating system when a computer is turned on. Once the chip is running as an ISP you can upload the code and work on the hardware building.
I am using NextFab studio in south Philadelphia to gain access to a metal shop to drill into the hardware of the Arduino. Below is an in process photo of what I’ve been working on so far.
If this blog post peaked your interest, please check out the Maker Meet up group that meets in the DSC from 12pm -1pm on the following days this semester: February 15th | March 1st | March 15th | April 5th | April 19th.