Sites and Google photos integration
Sites and Google Photos Integration
Introduction
Tired of running out of media storage on your sites.temple.edu site? The Google Photos & Picasa Viewer plugin may be the solution for you. This plugin allows you to connect your Google Photos account to your site. Connecting the account will allow you to showcase your Google Photos Albums, as well as the option to view your library of images.
Warning
ALL photos within the album that are shared via the Google Photos plugin will be visible to everyone who can view your site. If photos are added at a later date, they too will be shared automatically.
Please review and confirm that there are no NSFW photos (see the content section on the Sites policy page for more detailed description of what’s not acceptable) in your Google Photos albums before enabling on sites.temple.edu.
All content on sites.temple.edu must adhere to Temple University’s Tech Policies (such as no copyright infringement, acceptable use, privacy, etc.) including, but not limited to, the Electronic Communication Guidelines. To read more about our policies, please visit Sites policy page.
Only photos in albums will be shared. If you need assistance organizing photos into albums for sharing, please visit the support page.
This integration (currently) only works with a Temple.edu gmail account. At this time it will not work with a personal gmail account. If you wish to share photos from a personal account, you must share the album with your Temple account (you must then choose access ‘Shared’ in the Album ID Finder’).
In addition, please note that all images shown on the sites.temple.edu using the Google Photos & Picasa Viewer plugin must be edited / uploaded / deleted through Google Photos itself.
Setting up the Google Photos & Picasa Viewer plugin
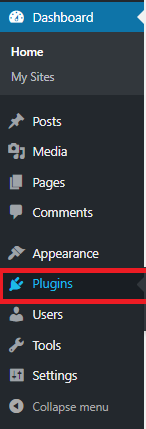
- From the Dashboard choose ‘Plugins’:
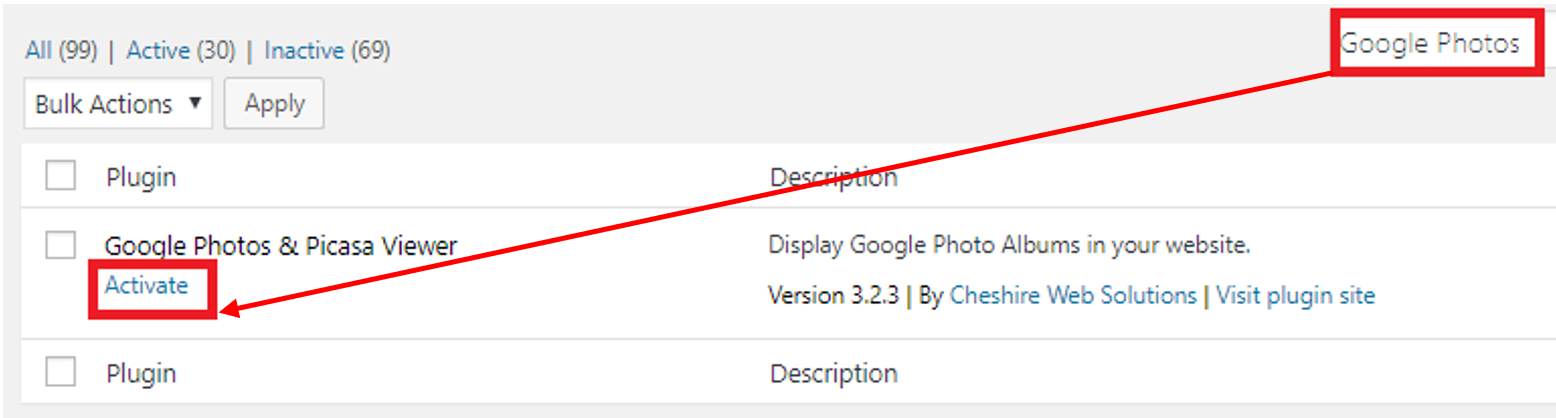
2. In the top right search bar search for “Google Photos & Picasa Viewer”. The list of plugins will be automatically filtered as you type. Click the ‘Activate’ button under the “Google Photos & Picasa Viewer”
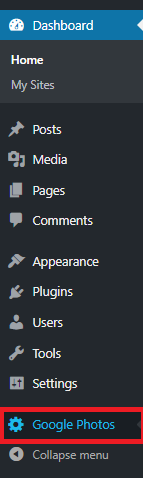
3. Once activated, click on the new “Google Photos” dashboard menu item:
4. Click the “Connect My Google Account” link. (Usually the link will open a new tab; however, this behavior changes depending on your browser settings.)
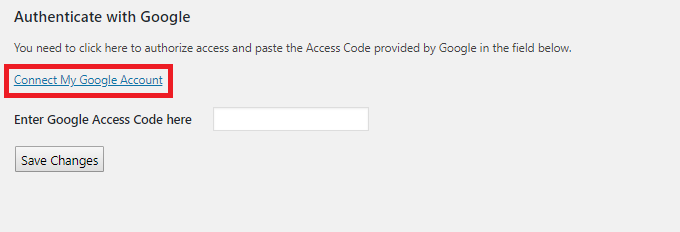
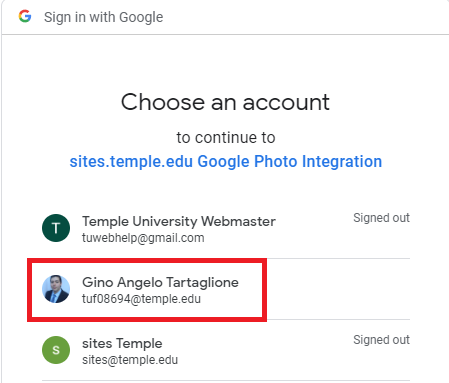
5. You will be asked to login to the Google account containing the photos/album you want to share.
6. Click on the account name you wish to use. Login if needed.
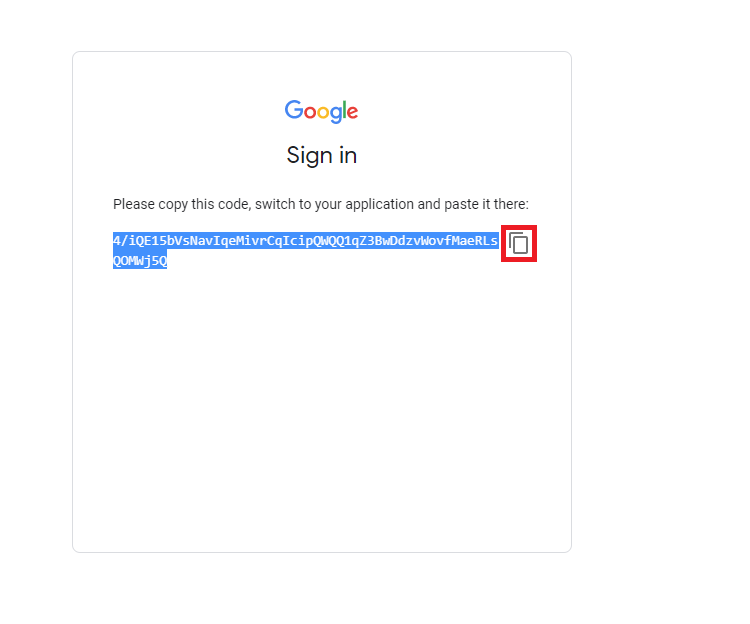
7. Once you choose the account, you will receive a message stating that “sites.temple.edu Google Photo Integration wants to access your Google Account”. Click the blue “Allow” button near the bottom of the message.
8. This will generate a code that you will have to copy. Click the icon with two squares to copy the code.
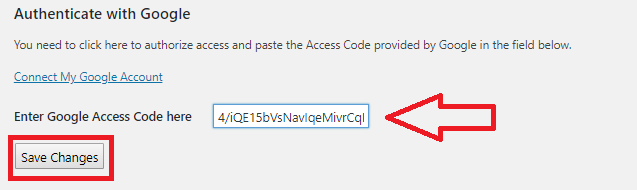
9. Now navigate back to your sites Google Photos settings on sites.temple.edu. (Usually you can just close the current tab.)
10. Paste your code in the box that says “Enter Google Access Code here”, then click “Save Changes”.
11. You are now ready to display your Google Photos on your site.
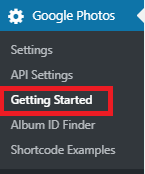
12. To learn more on how to initially set up your Google Photos pages, visit the “Getting Started” tab under the “Google Photos” section of the dashboard.
To see examples of how this plugin can be used, and what shortcodes are available for use on your own site, please visit the demo site.
You must be logged in to post a comment.