How Can We Help?
Using Categories
Categories provide a helpful way to group related posts together, and to quickly tell readers what a post is about. Categories also make it easier for people to find your content. Categories are similar to, but broader than, tags. For more information on the differences between categories and tags please check out this support doc.
Depending on the theme and widgets you have activated, categories can be displayed at the top or bottom of posts, on the individual post view, and/or in the sidebar. You can assign multiple categories per post (you must assign at least one), and categories can be organized hierarchically.
Adding Categories via the Categories Metabox
You can assign and/or add new categories to posts before you publish them using the Categories metabox to the right of the post editor:
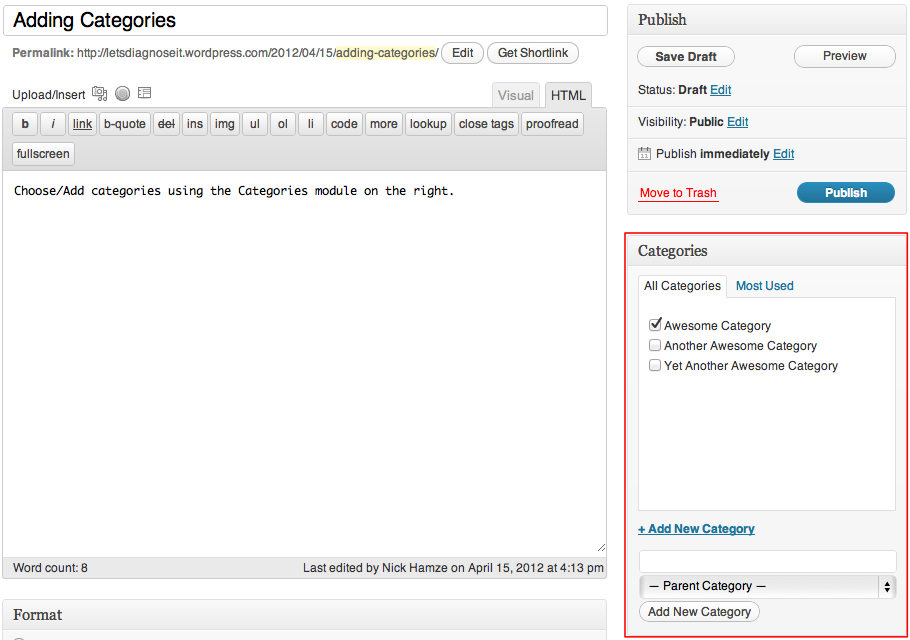
Select the checkbox next to a category name to add it to a post.

- If you would like to add a new category to your blog and associate it with the post, click + Add New Category.
- Click the Most Used tab at the top of the module to select from your already created categories that you use the most.
- Use the Parent Category drop down menu to nest a category within a category.
Adding Categories via the Dashboard
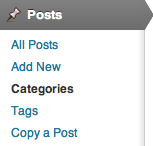
You can also add new categories and manage existing ones from Posts -> Categories in your dashboard.
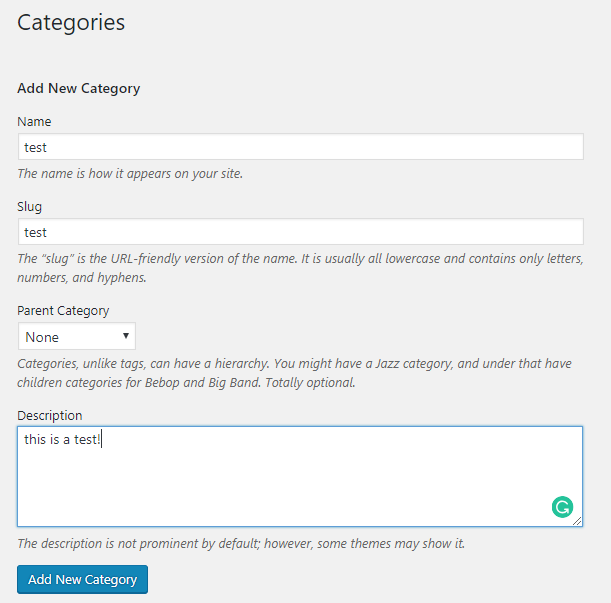
You will be presented with a list of your existing categories and an option to add new categories.
You can add a new category by filling out the fields:
- Category name – As expected, the name of your category.
- Category slug – The “slug” is the URL-friendly version of the name. It is usually all lowercase and contains only letters, numbers, and hyphens.
- Category parent – If you want to nest a category within a category, select the parent category. Otherwise leave atNone.
- Description – Describe what the category is for. This description will appear as a tooltip if you use the category widget. (Optional)
Managing Categories
The Posts -> Categories page in your dashboard displays all your categories and shows the name, description, and number of posts belonging to each category. If you move your mouse over a category a set of options will appear, allowing you to edit, quick-edit, or delete that category:
If you click on Quick Edit the category will change into an edit box and you can rename the category quickly:
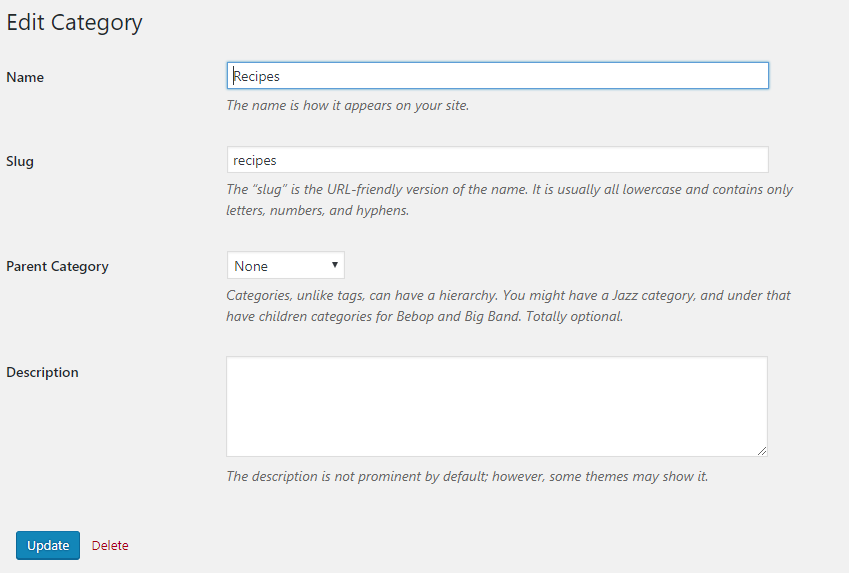
If you click on Edit you will be taken to a separate page where you can edit the name, parent, and description. This functions exactly the same as adding a category.
Clicking on Delete will delete that category. When a category is deleted, all posts that were only in that category will be assigned to the default category. If a post was also in other categories it will remain untouched.
Note: You cannot delete the default category, but you can change the name and URL slug.
Bulk Actions
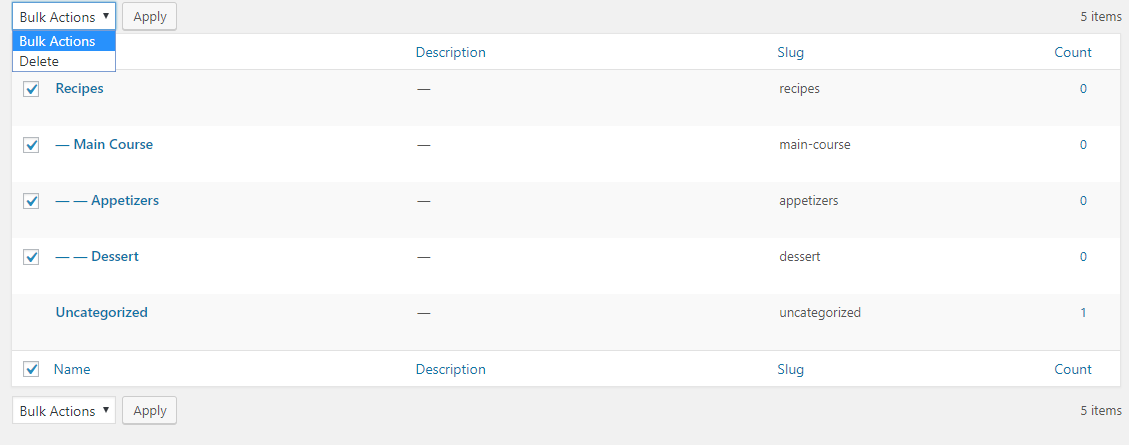
If you have a lot of categories that you want to delete, then you can use the bulk actions feature. Select each category you want to delete using the checkbox to the left of the category name.
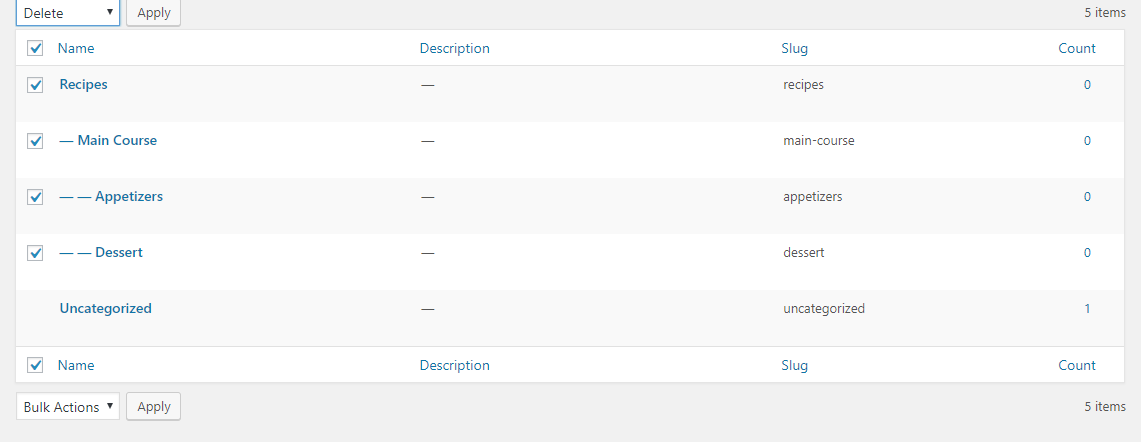
If you want to select all categories, click the checkbox at the top:
Once you have selected the categories you want to delete, select Delete from the Bulk Actions menu, and then clickApply. The categories will be deleted. When a category is deleted, all posts that were only in that category will be assigned to the default category. If a post was also in other categories it will remain untouched.
Setting the Default Category
A default category (uncategorized) will be assigned to published posts if you don’t specify one. The default category can be changed under Settings -> Writing in your dashboard.



You must be logged in to post a comment.