How Can We Help?
Export your Site
There’s a few scenarios in which you want to backup or export your site.
- You are graduating or otherwise leaving Temple University and want to take your site with you to another WordPress instance.
- You want to make a copy of your site on Sites.temple.edu.
- You want peace of mind that you have a backup of your site saved.
You should be aware that using the Tools->Export feature on the dashboard does not export images or other uploads, nor does it export site settings.
Exporting “All Content”
The best way to preserve your data for scenarios #1 and #2 (above) is to:
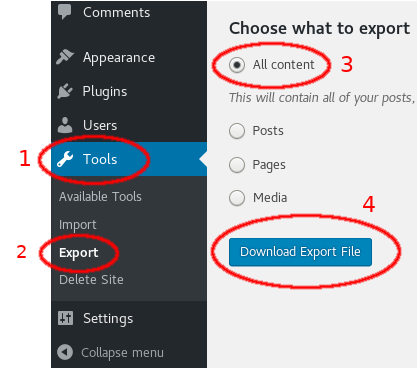
- Export your data using the Tools->Export on the dashboard.
- Click Tools
- Click Export
- Choose All Content
- Click Download Export File
- Do not delete the old site! See the caveats below.
- Login to the new server that you want to import the site into (either another site on Sites.temple.edu or on another WordPress instance).
- Import your site by going to Tools->Import and selecting the file you exported in step #1.
If you follow this export/import process, the new WordPress site will connect to the old site and copy all your images automatically. However, please note two important caveats:
- The old site must be available (not deleted) and accessible over the internet.
- The old site must have the privacy options set so that it is visible by the public.
If the old site is available, all images and other attachments will automatically be copied to the imported site as mentioned above. If the old site is not available, only the text content will be imported.
Please note: the import process will not change the new site’s theme; therefore, if the theme being used on the old site is not same as the theme currently active on the new site, the site will most likely look different after the import is completed, even though the content has been imported.
Saving Uploaded Content
If you are concerned that your site on Sites.temple.edu may not be accessible when you import it or if you want a full backup for peace of mind (scenario #3 above), then you will need to download all media (including images) manually, along with recording site settings.
- Click Media from your dashboard.
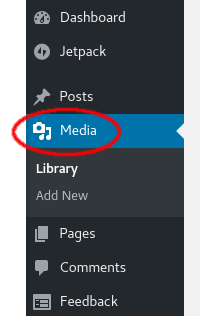
- Click on an image or file to display the attachment details.
- Right click and choose Save Image As. Save it to a safe location on your computer.

- Repeat this process for all subsequent images/attachments, until all are saved to your computer.
You may wish to archive the site export and the attachments into one ZIP file, then save it to your file storage account for safe keeping.
Importing Your Site to WordPress.com
WordPress.com offers the option to host your website for free. This is a good solution for keeping your site after you leave Temple. For instructions on how to set up a new site, see Creating Your Site on WordPress.com. To import your site to WordPress.com, perform the steps below:
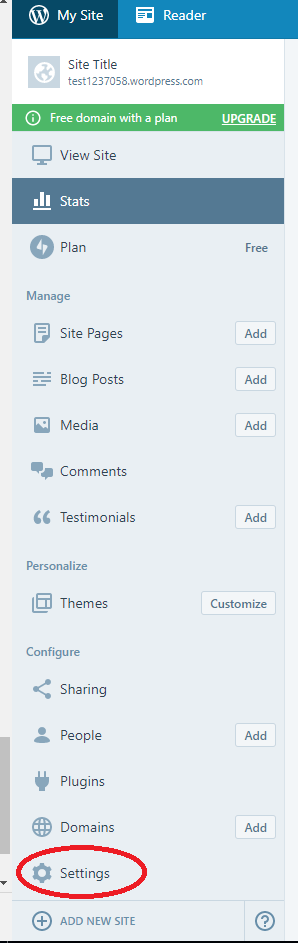
- Under the My Site tab click Settings (near the bottom left of the menu).
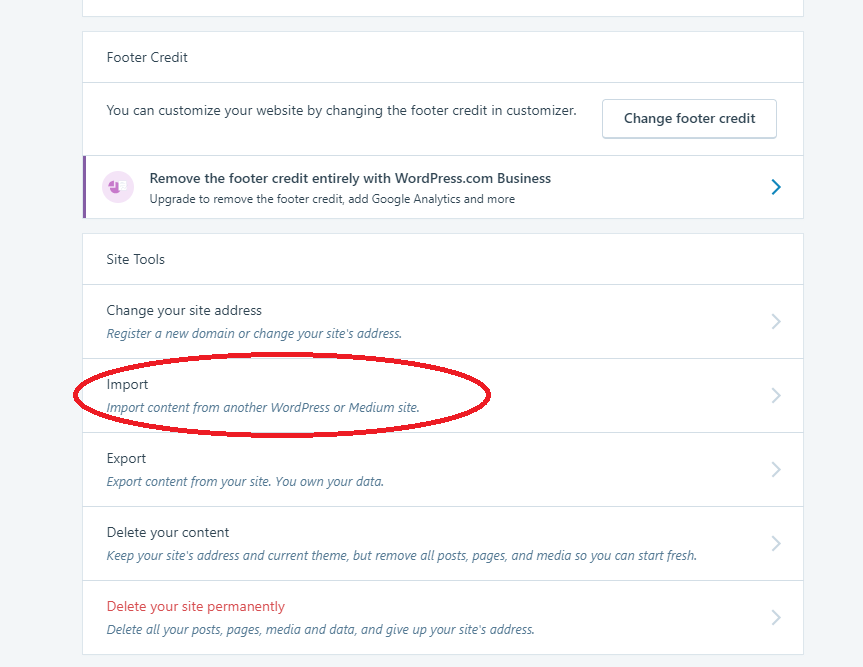
2. Scroll down to the bottom of the page to Site Tools. Under Site Tools click Import.
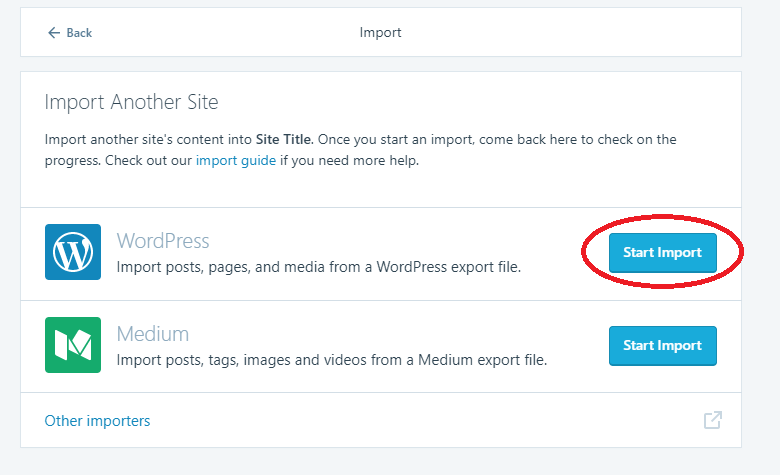
3. On the WordPress line, click Start Import.
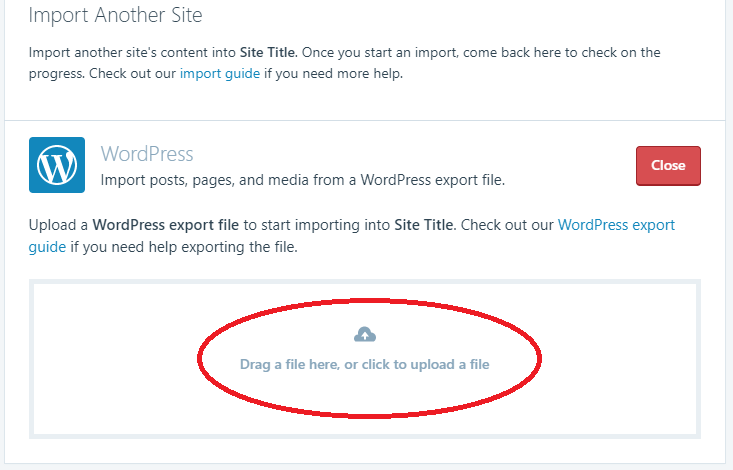
4. Upload the files from your exported site on sites.temple.edu.
5. Once the files are uploaded, click Continue.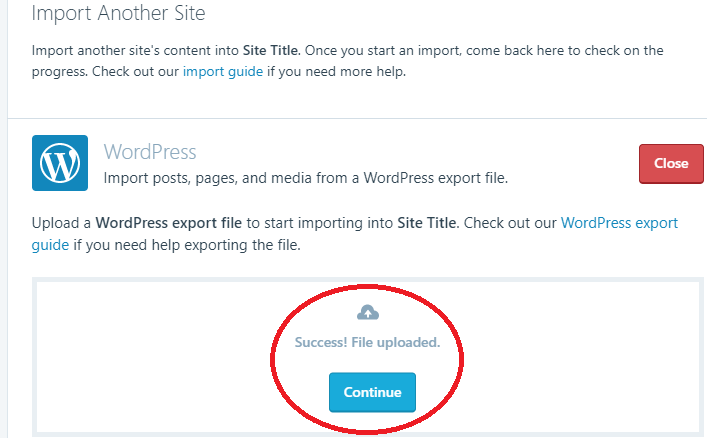
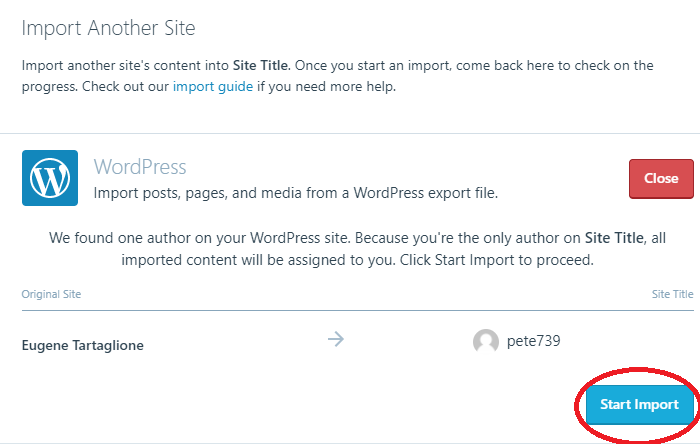
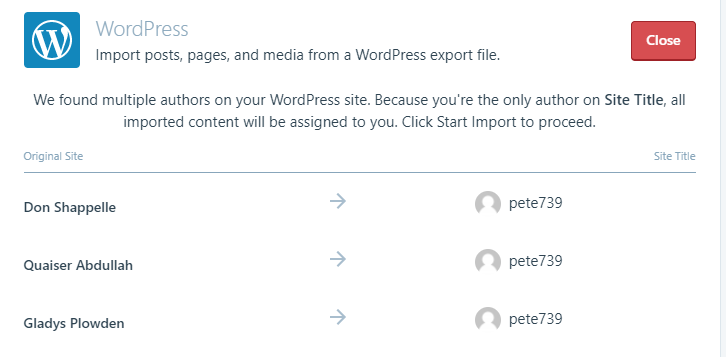
6. Click Start Import. (Under Original Site, a list of all the authors on your sites.temple.edu pages will appear.)
 It can take between a couple of minutes to about an hour to upload your files, depending on the size of your original site. When the import process is complete, your site will be available on your WordPress.com page.
7. Go through your old site’s settings and use them to configure your new site’s settings.
8. If you have multiple sites on sites.temple.edu, repeat these steps for each site you wish to keep.
You must be logged in to post a comment.