How Can We Help?
Troubleshooting Monitors
Common Issues
- I can’t move my mouse between my monitors
- I have a second monitor, but it’s not displaying a picture
- My icons and start menu are showing up on the wrong screen
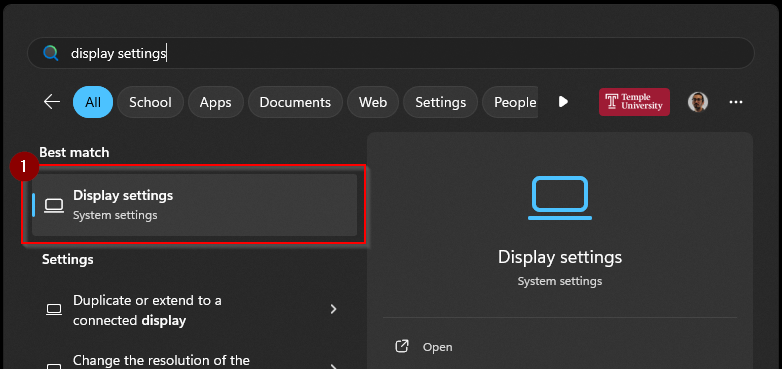
Find the Display Settings
- Search for Display Settings in the Windows 10/11 search bar
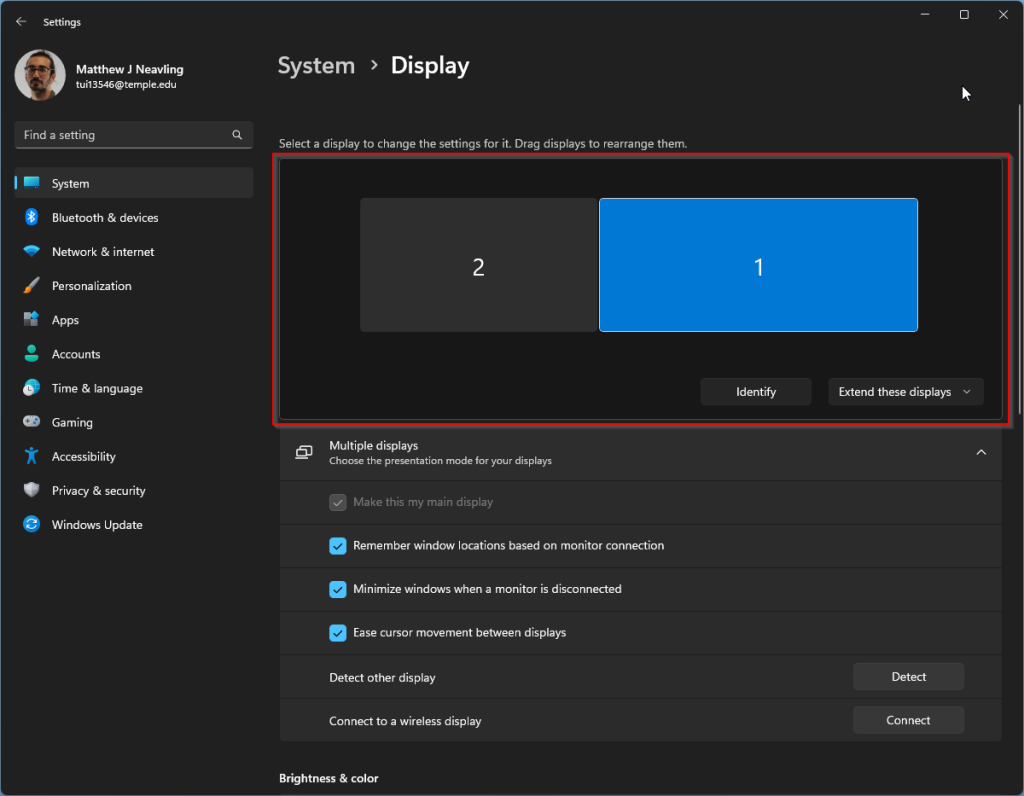
- Your connected monitors are represented by a field with numbered rectangles highlighted below.
If you see a second display in the highlighted area, but you aren’t seeing a picture on your second monitor, skip to Change Projection Settings.
If you don’t see a second display in the area highlighted below, but a second monitor is attached, skip to Troubleshooting a Second Monitor.
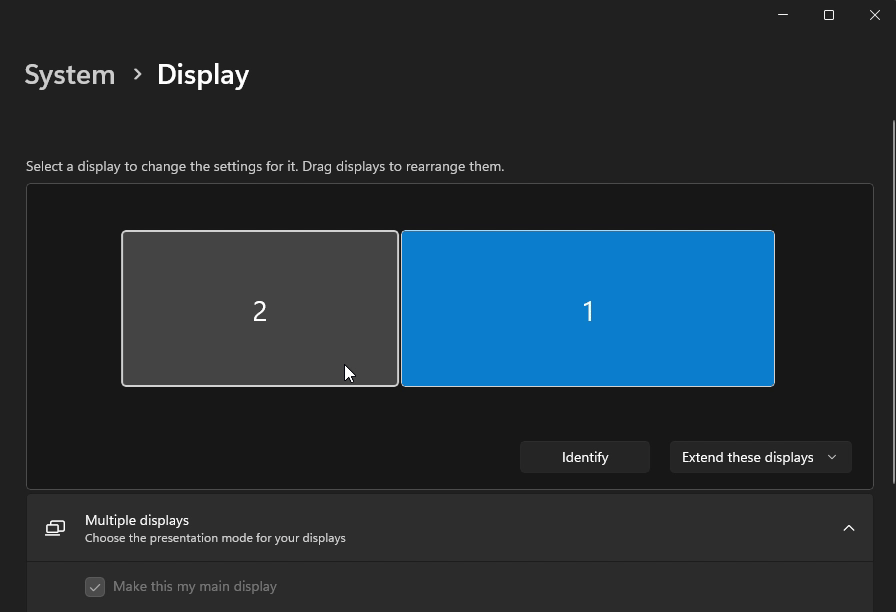
Change Monitor Orientation
- In the Display Setting window, click “Identify”. Numbers will appear on your monitors corresponding to the numbers of the rectangles in the field.
- Click and drag the numbered rectangles to mimic the physical orientation of your monitors.
- Click “Apply”
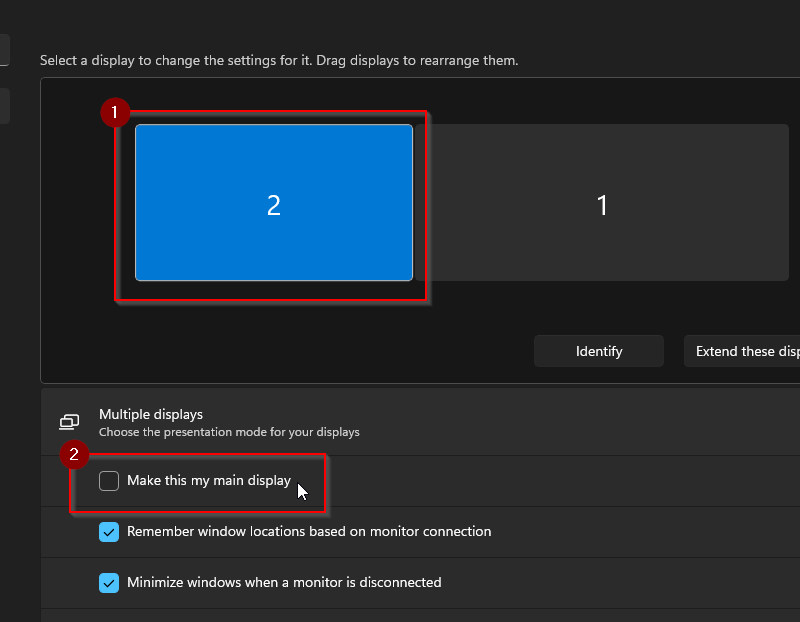
Change Primary Monitor
- Click on the rectangle in the field that represents the monitor you want to be your primary display.
- Check the box labeled “Make this my main display”
Change Projection Settings
- Click on the rectangle representing your second monitor.
- Change the projection setting from the dropdown in the bottom right.
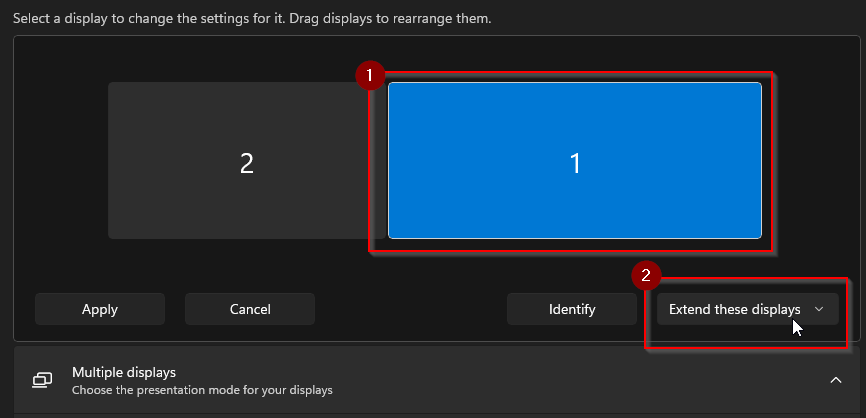
Keyboard Shortcut
You can also use a keyboard shortcut to change your projection settings on the fly.
- Press
WinKey +Pto open Projection Settings. - Select Extend to treat the second display as an extension of the main display
- Select Duplicate to show the same picture on both displays.

Troubleshooting a Second Monitor
First Steps
- Confirm the monitor power cable is plugged in and the monitor’s physical power switch is in the on position.
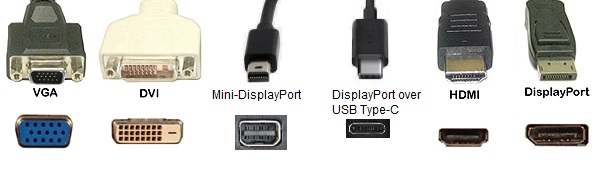
- If the monitor has multiple inputs, confirm it’s set to use the input your device is connected to. See Types of Connections below.
- Make sure the cable connecting the computer and monitor is plugged in all the way and secure.
- Open your computer’s Display Settings and see if the second monitor is showing up.
Types of Connections
| Type | Description |
| HDMI | The most common type of connection for most monitors. The connector is flat on one side and beveled on the other. |
| DisplayPort | The second most common type of connection for modern monitors. The connector is rectangular except for a divot in one corner. It also has a latch which secures the connection once it’s plugged in completely. The button on the connection needs to be pressed in order to release the latch. |
| Mini-DisplayPort | Common for Mac devices. |
| DVI | Older analog display connector. |
| VGA | Older analog display connector. |
Restart the monitor
- Find the physical power switch on your monitor
- Turn the monitor off, wait a few seconds, then turn the monitor on again.
Update your Display Drivers
Through Windows Update
- Search Update and launch Check for updates
- Expand the menu next to Check for updates and select Check online for updates from Microsoft Update.
- Install all discovered updates.
Manually
Procedures vary for different makes and models of monitor.
- Locate the make and model number of your computer.
- Visit your computer’s support page on the manufacturer’s site.
- Locate and download the latest driver package
- Follow on-screen instructions to install the driver, then restart your device.